How To Configure Elasticsearch in Magento 240 Admin Panel?
Wednesday, 09 December 2020 15:02

Elasticsearch is a powerful open-source search and analytics engine using Apache Lucene. It is able to handle a large number of use cases, support multiple tenancies and full-text search on HTTP web interface. In simple words, the Elasticsearch helps to store and map all documents effectively in order to optimize the search and retrieval function. In the scope of this blog post, we will guide you how to Magento 2 Elasticsearch in admin panel.
Magento Elasticsearch Requirement
As of Magento 2.4.0, MySQL is no longer used for search. You must use Elasticsearch. Magento is tested with Elasticsearch 7.6.x
In addition to a compatible Magento Elasticsearch version, you should also have:
- Firewall and SELinux
- Java Software Development Kit (JDK)
Let’s explore three steps to configure Elasticsearch in Magento 2 below:
- Step 1: Configure Search Options
- Step 2: Configure the Elasticsearch Connection
- Step 3: Configure Suggestions and Recommendations
Step 1: Configure Search Options
From the Admin sidebar, select Stores. Then under Settings, select Configuration.
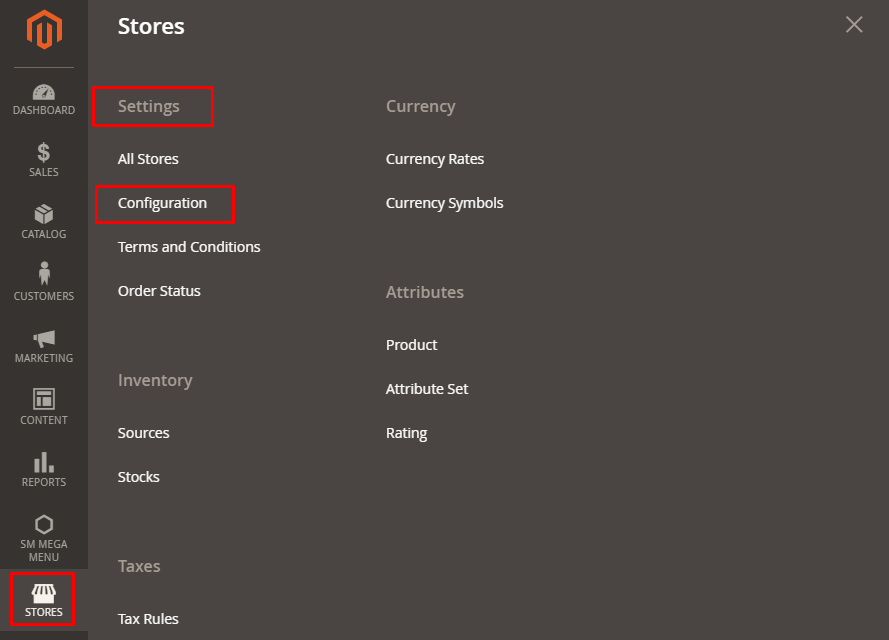
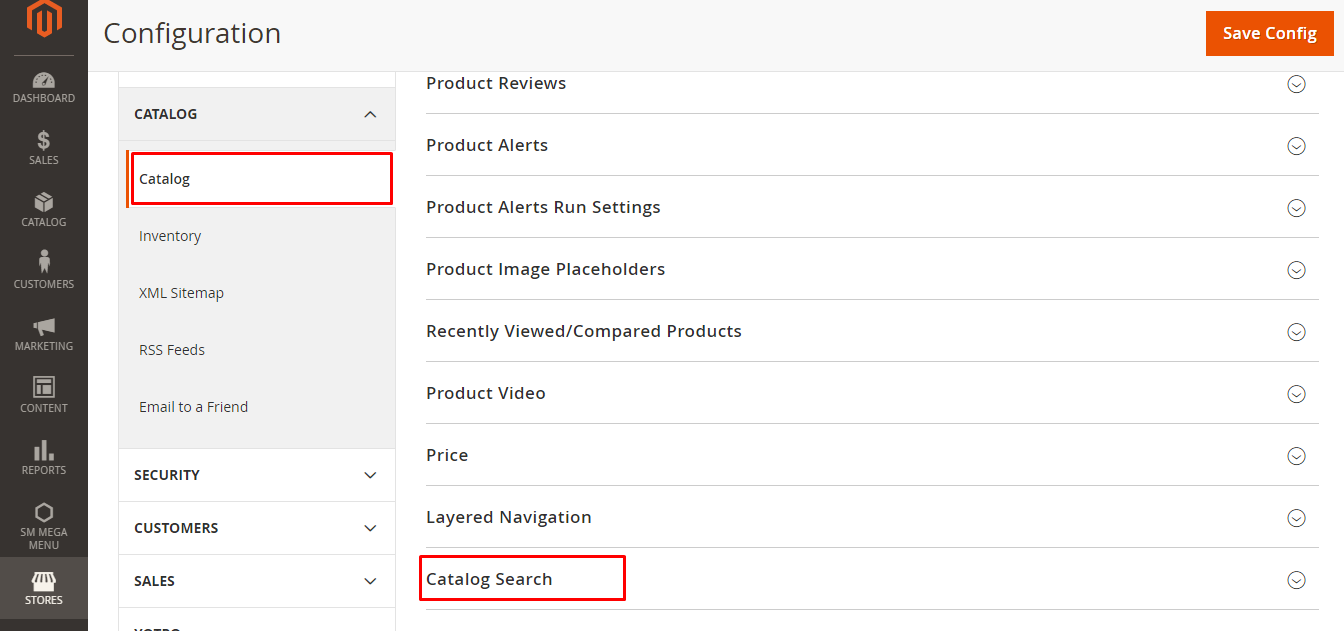
In the panel on the left of the screen, under CATALOG >> Catalog >> Catalog Search to expand this section.
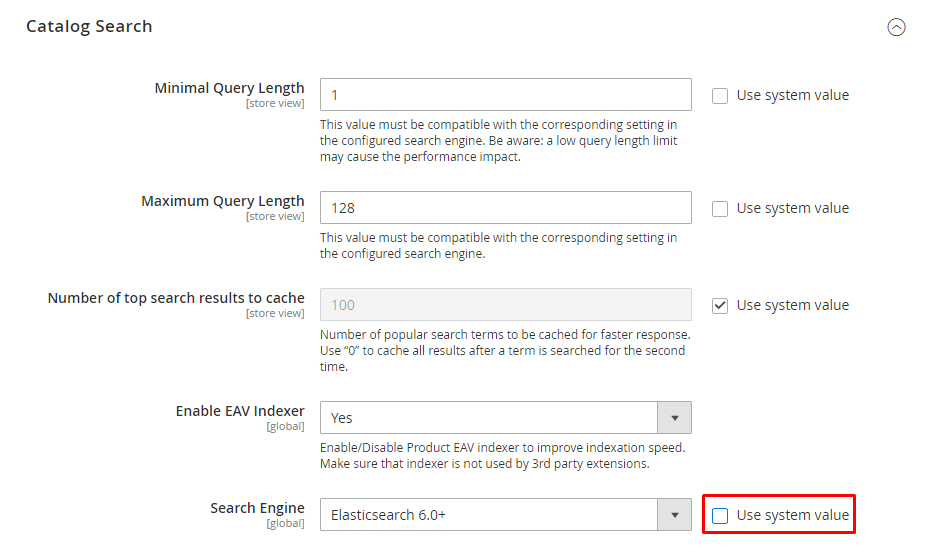
In the Search Engine field, clear the Use system value checkbox and select the version of Elasticsearch that is installed on your server.
- Elaticsearch (Deprecated) Elasticsearch 2.0+ has reached the end of life and is considered as inactive development or maintenance.
- Elaticsearch 5.0+ (Default) Elasticsearch 5.0+ is planned for end of life.
- Elasticsearch 6.0+ (Recommended) For the best performance, we highly recommend that you use the latest version of Elasticsearch 6.0+.
-
In the Enable EAV Indexer field, select Yes/ No option to enable/ disable the Product EAV indexer. This functionality increases indexation speed and keeps the indexer from the use by 3rd party extensions. This feature does not display for the system value Search Engines.
-
To restrict the length and word count of search query text, set the Minimal Query Length and Maximum Query Length.
Note: The value set for this minimum and maximum range must be compatible with the corresponding range set in your Elasticsearch search engine configurations. For example, if you set these values to 2 and 300 in Magento, update the values in your search engine.
-
To restrict the number of popular search results to cache for faster responses, enter a number on Number of top search results to cache field.
-
To restrict the maximum number of search results to show for search autocomplete, set an amount for Autocomplete Limit. Limiting this amount enhances the performance of searches and cut down the displayed list size. The default number is 8.
Step 2: Configure the Elasticsearch Connection
- In Autocomplete Limit, enter the maximum limit for similar suggestions for each query.
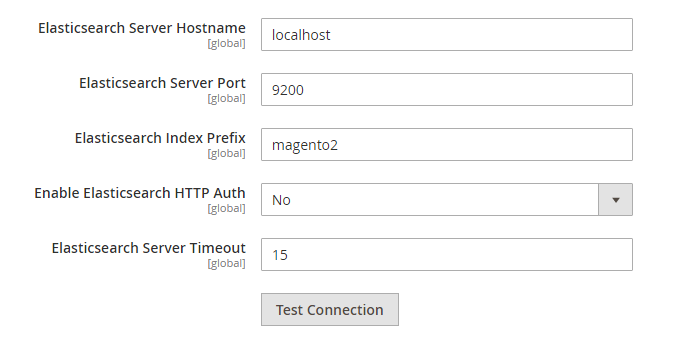
- Elasticsearch Server Hostname: Enter the fully qualified hostname or IP address of the server that is running the Magento 2 Elasticsearch.
- Elasticsearch Server Port: Enter the Magento 2 Elasticsearch server proxy port. If "9200" does not work for you, try "8080". If you’re using a secure proxy, you can also use port "443".
- Enter a prefix in the Elasticsearch Index Prefix field to determine the Elasticsearch index. For instance: Magento2.
- In the Enable Elasticsearch HTTP Auth field, select Yes option to use HTTP authentication to suggest a username and password access Elasticsearch Server.
- Enter the number of seconds before the system times out to the Elasticsearch Server Timeout field. The default number is 15.
- To verify the configuration, click to the Test Connection button.
Step 3: Configure Suggestions and Recommendations
Search suggestions and recommendations can affect server performance
In Enable Search Recommendations field, select Yes, recommendations will be displayed for search strings.
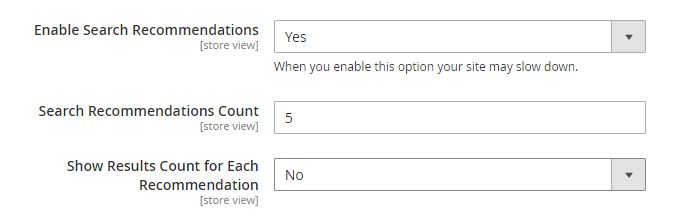
- Fill the Search Recommendation Count field with the number of recommendations to offer.
- In the Show Results Count for Each Recommendation field, select Yes the count for results would be displayed with each suggestion.
In the Enable Search Suggestions field, choose the Yes option if you want to show suggestions in your Elasticsearch search space. Then, take the following actions:
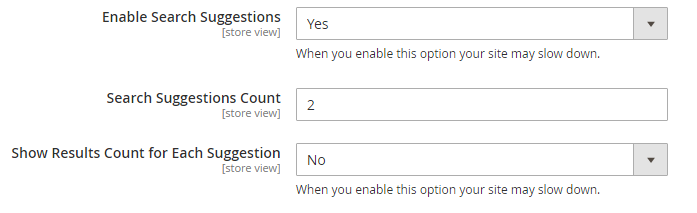
- Fill the Search Suggestions Count field with the number of search suggestions to offer.
- In the Show Results for Each Suggestion field, select Yes option to display the number of results found for each suggestion.
When you finish your configuration, click to the Save Config button.
Above is the detail instruction to configure Elasticsearch in Magento 2. If you have questions on any steps, don’t hesitate to contact us.

Latest from Sarah
- Black Friday & Cyber Monday 2023 Sale: Up to 40% OFF Storewide & Extra Gift
- Halloween Sale Party! 30% OFF Everything and Exclusive Themes on ThemeForest
- Customer Support Notice for Vietnamese Independence Day 2023
- Big Sale for August! 30% OFF on Magento Themes and Magento Extensions
- Mid Year Sale 2023! Upto 40% OFF Storewide and Exclusive Themes on ThemeForest