
Let's follow these steps to add Google Analytics to your store
- Create an Account on Google Analytics
- Turn On eCommerce Tracking
- Configure Google Analytics on Magento
Step 1: Create Account on Google Analytics
1. The first step is to establish a Google merchant account. Visit the Google Merchant Center, and do one of the following:
- If you have a Google account, enter your Email address and password, and click the Sign In button.
- Click the Sign Up button, and follow the instructions to create an account.
Enter all the details of your store like website name and website URL, etc.
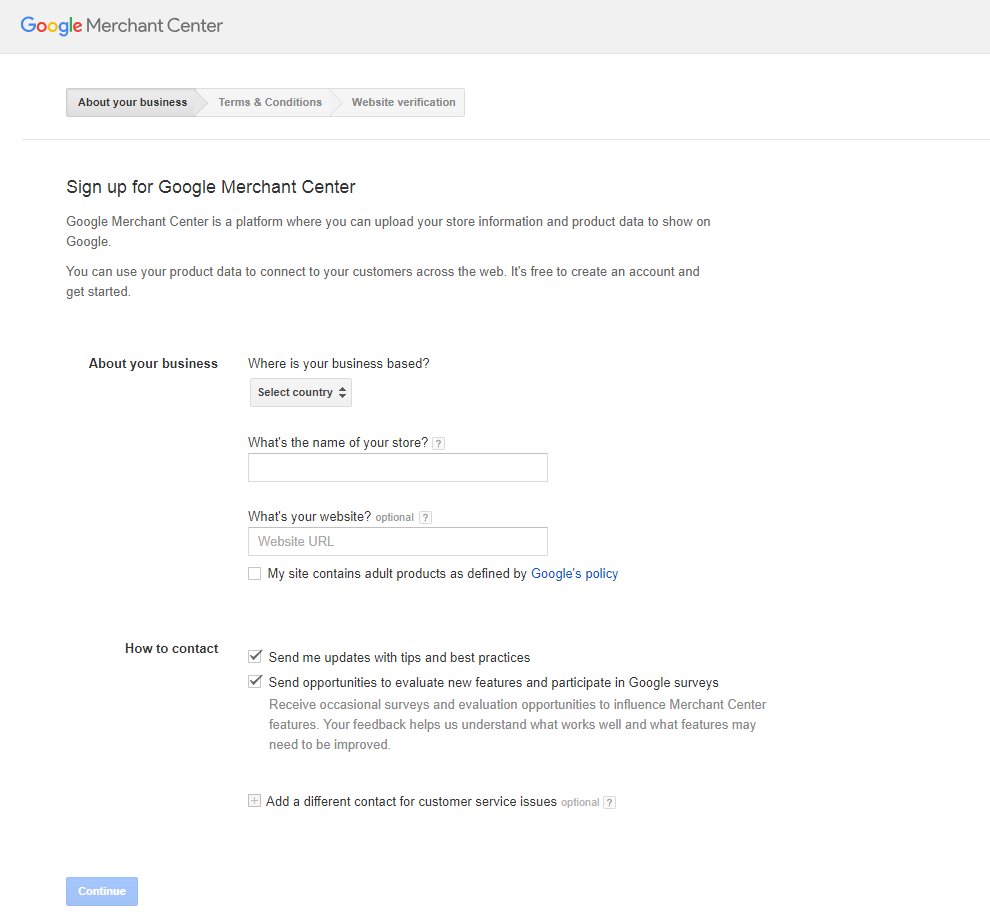
Now click on "Accept" to accept the Terms and Conditions
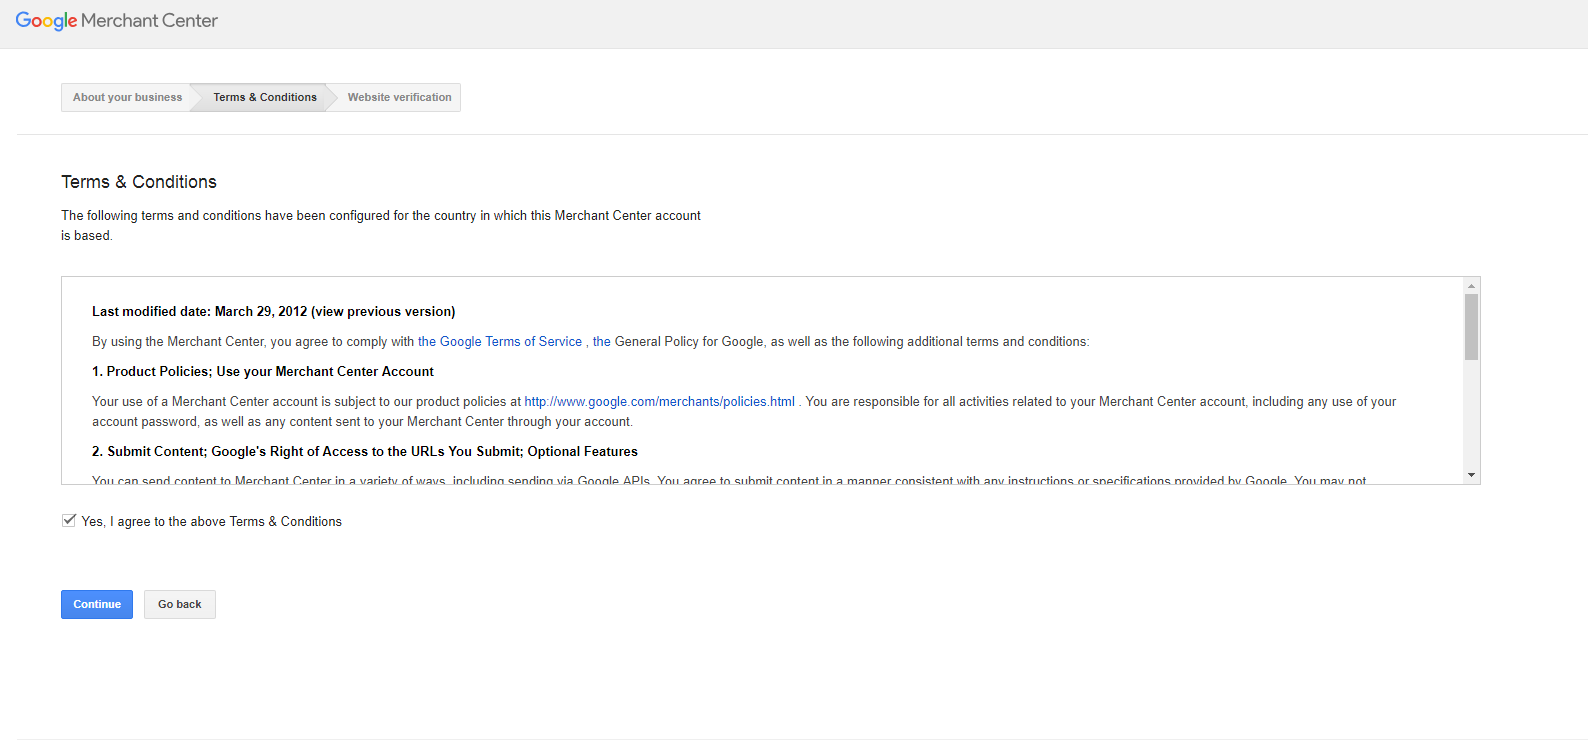
At this time, your Website URL is unclaimed and unverified. For detailed instructions, see: Google Merchant Center.
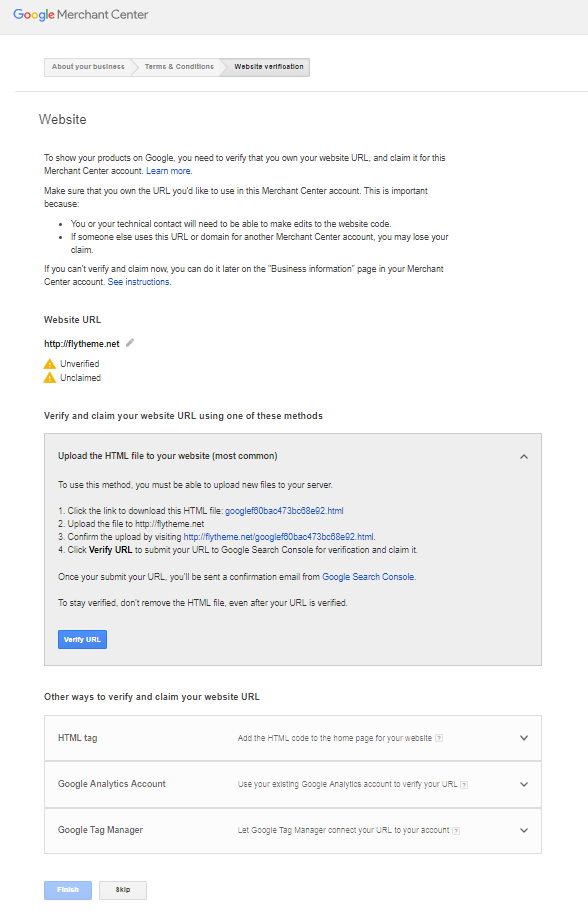
Complete the remaining General settings information, and Save Changes.
2. When you sign-up for an account, a report appears that shows your new Google Analytics account number in the following format: UA-XXXXXXX-1. Write this number down, because it is required to complete the configuration for your store.
Step 2: Turn On eCommerce Tracking
1. Sign in to your Google Analytics account.
2. On the main menu, select Admin.
The options in the Administration section are organized into three columns under Account, Property, and View. If you have multiple accounts or stores, make sure that the Account button is set to the correct account, and that the Property button is set to the correct store.
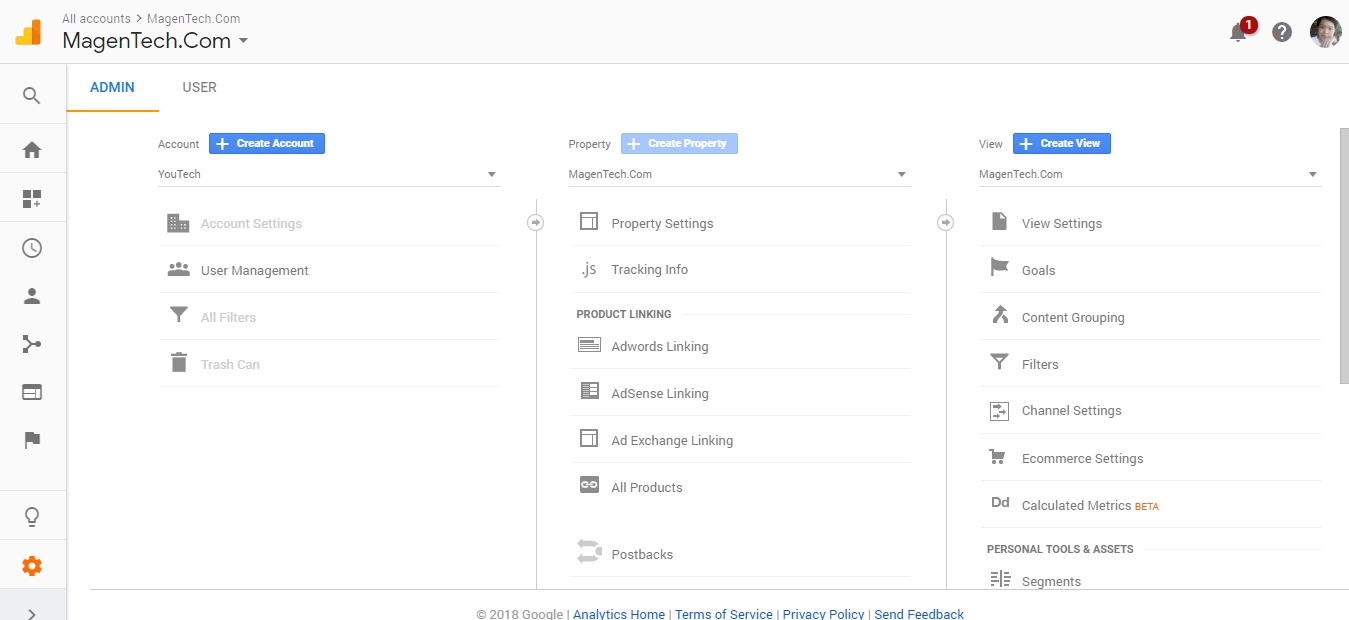
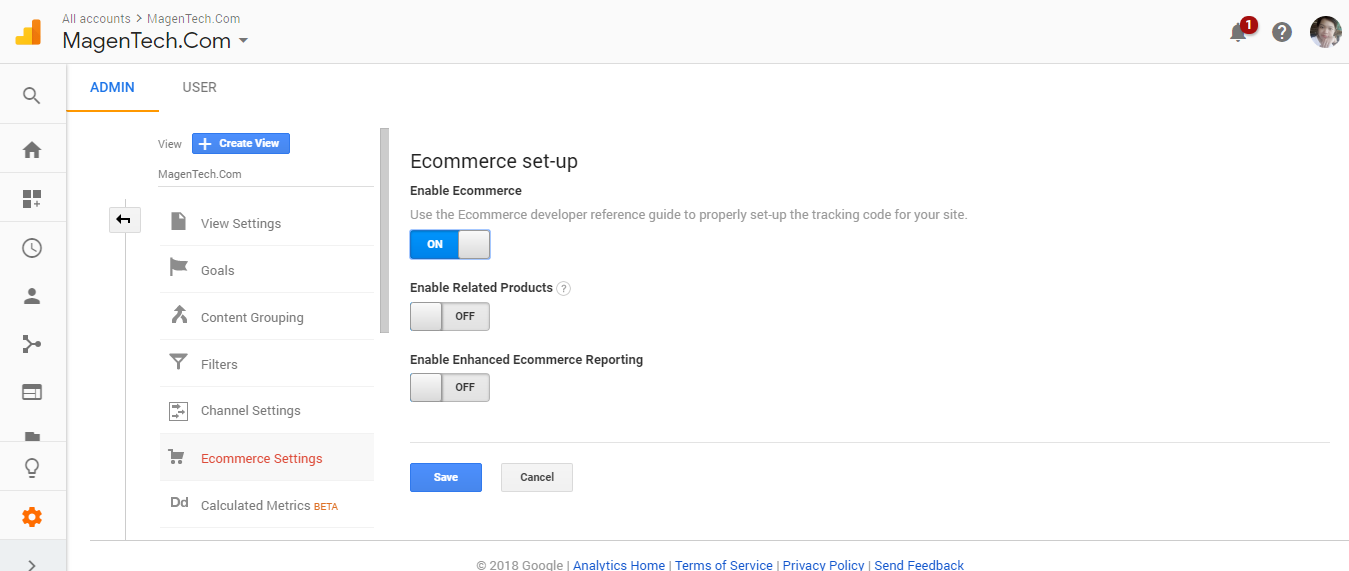
3. In the View column, select the View Settings option.
4. In the panel on the left, select eCommerce Settings. Then, do the following:
a. Click the Status switch to turn on eCommerce Tracking. Then, click the Next step button.
b. Click the Submit button to save the setting. When the Success message appears at the top of the page, you are done.
Step 3: Configure Google Analytics on Magento
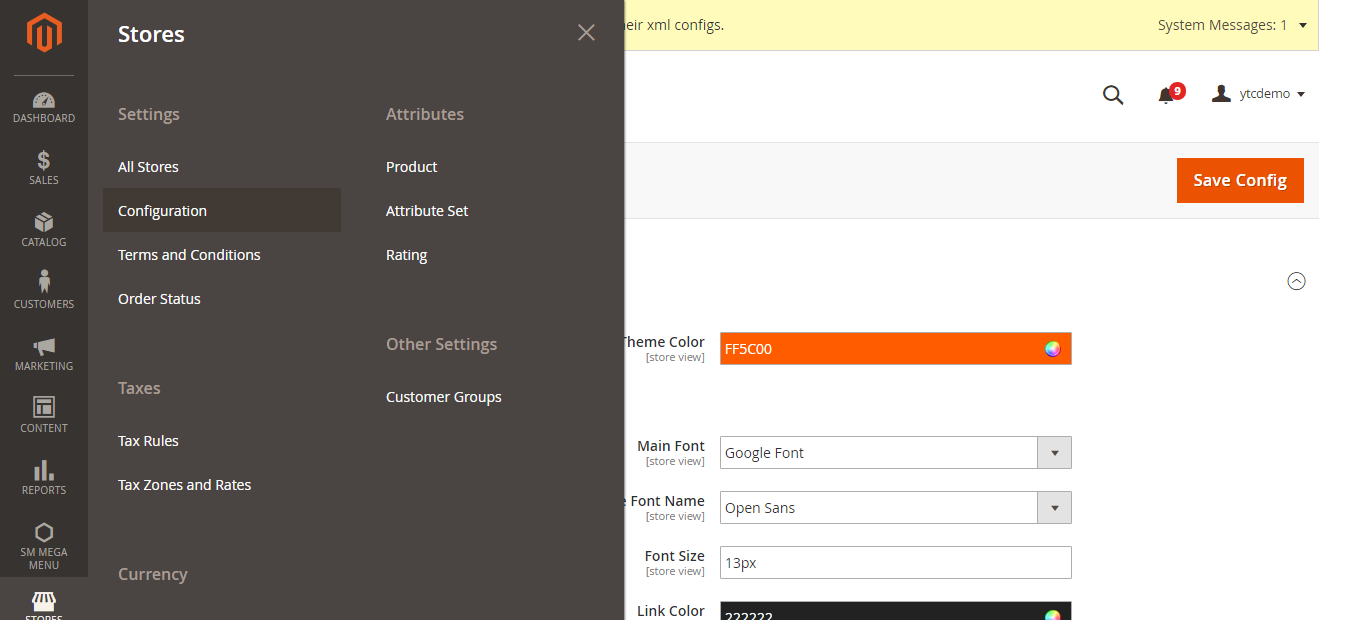
1. On the Admin menu, select Stores >> Configuration. Then in the panel on the left under Sales, select Google API.
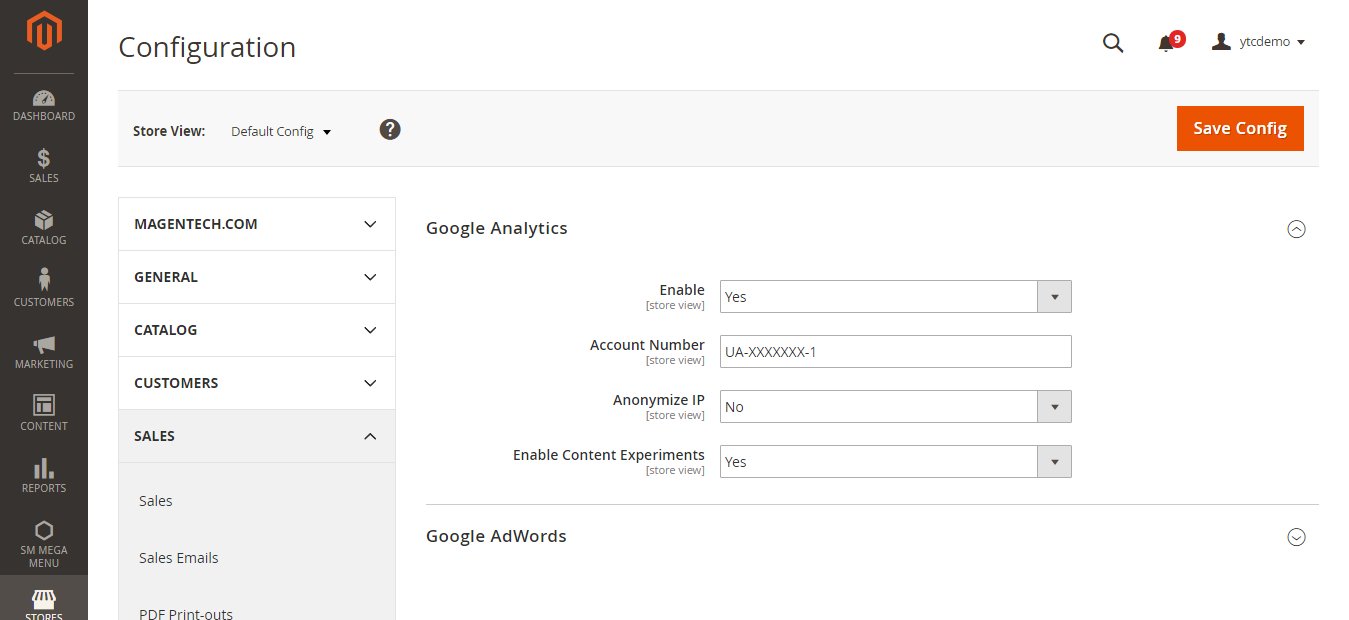
2. Click to expand the Google Analytics section, and do the following:
3. Set Enable to "Yes."
4. In the Account Number field, enter the Google Analytics account number, or tracking code that you wrote down when you signed up for the service.
5. To render as anonymous part of your visitors' IP addresses before the data is sent to Google, set Enable IP Anonymization to "Yes."
6. When complete, click the Save Config button.
Final Words
Google Analytics for Magento is a free service which is very useful for eCommerce owners to get proper traffic stats and much more. If you have any problems or would like to add to the discussion, just leave a comment below and don’t forget to share this article with your friends you think may need it!
Thanks for reading!


