
Add New Attribute
Go to the Admin Panel of your Magento store and navigate to Stores → Product.
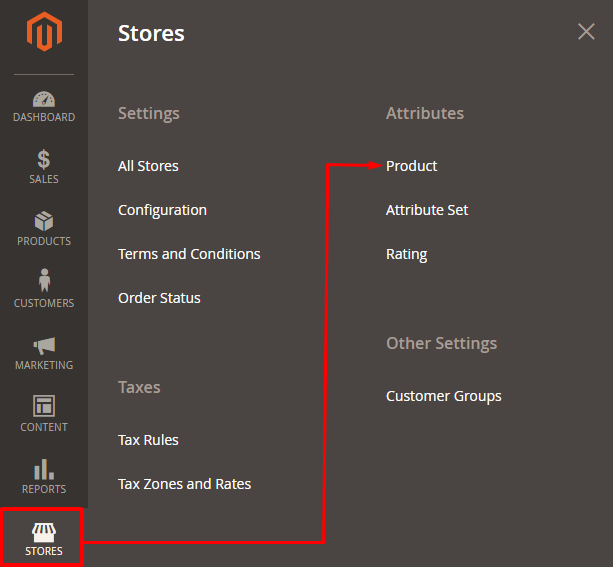
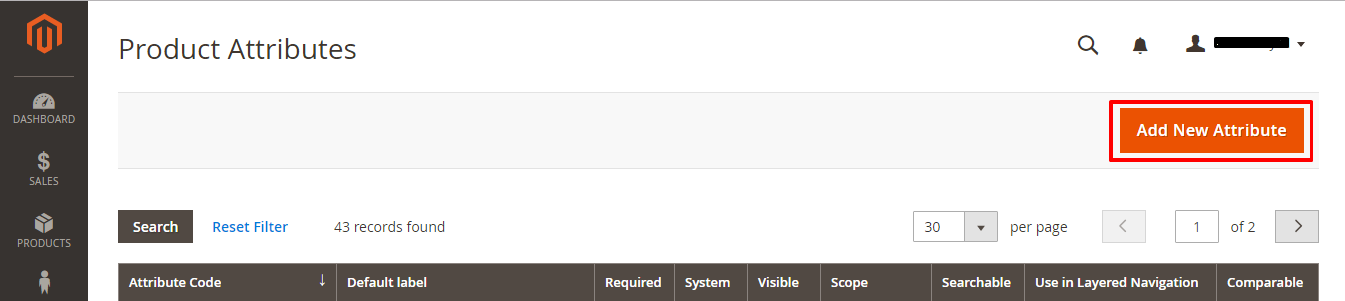
Now click on Add New Attribute.
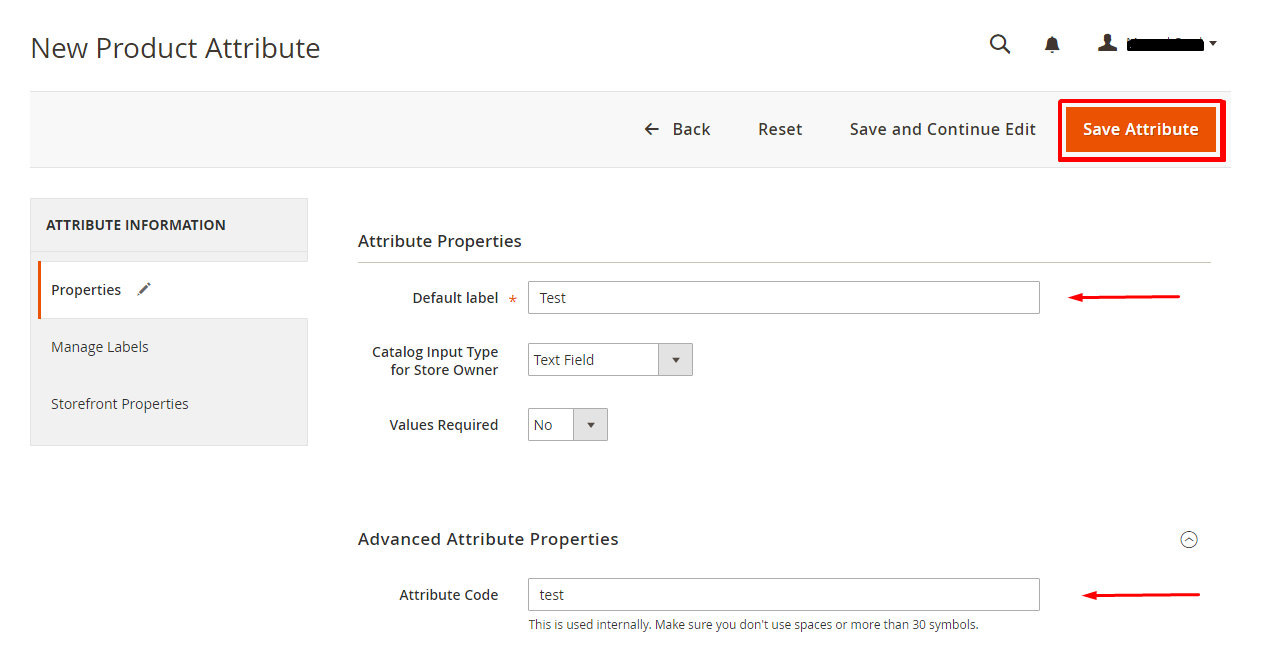
Set Default label as Test and Attribute Code as test. Now click on Save Attribute.
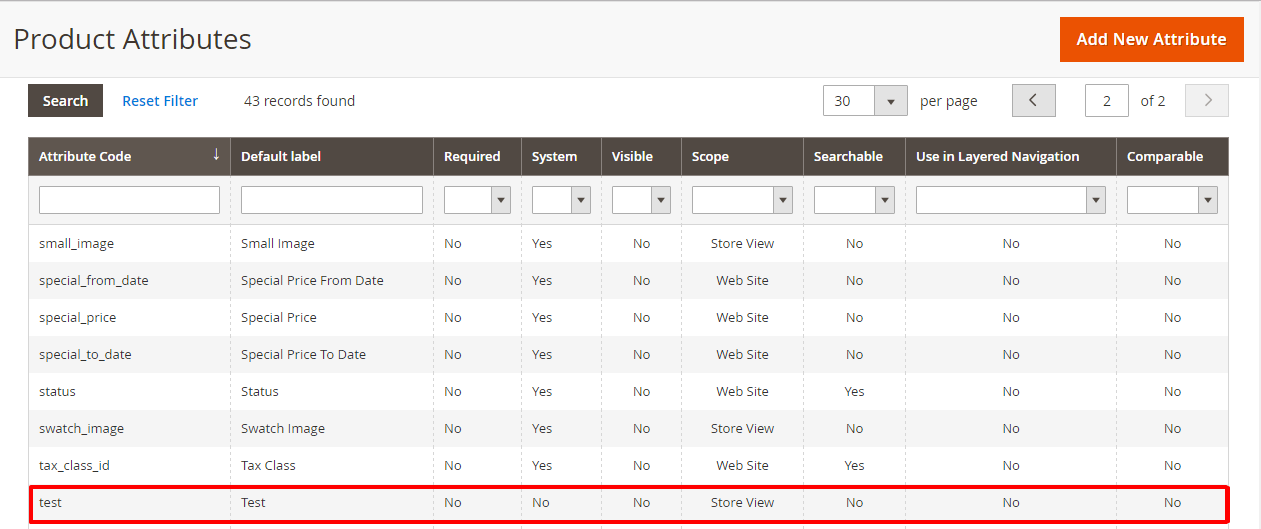
We can see our Attribute (test) in the list as shown below:
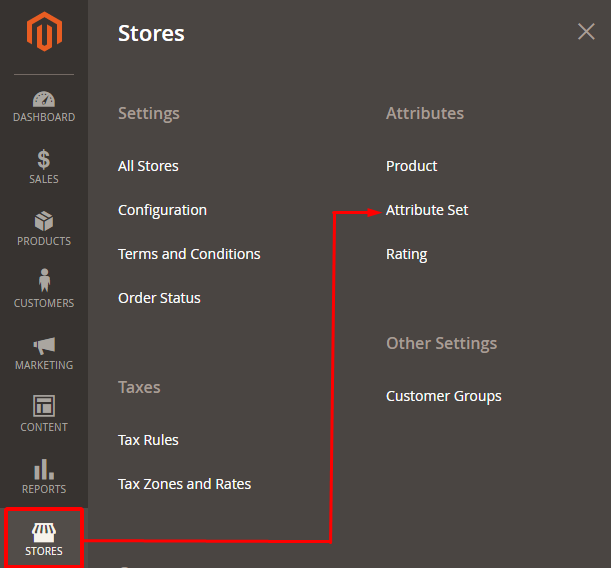
Select Or Create Attribute Set
Navigate to the Stores >> Attribute Set.
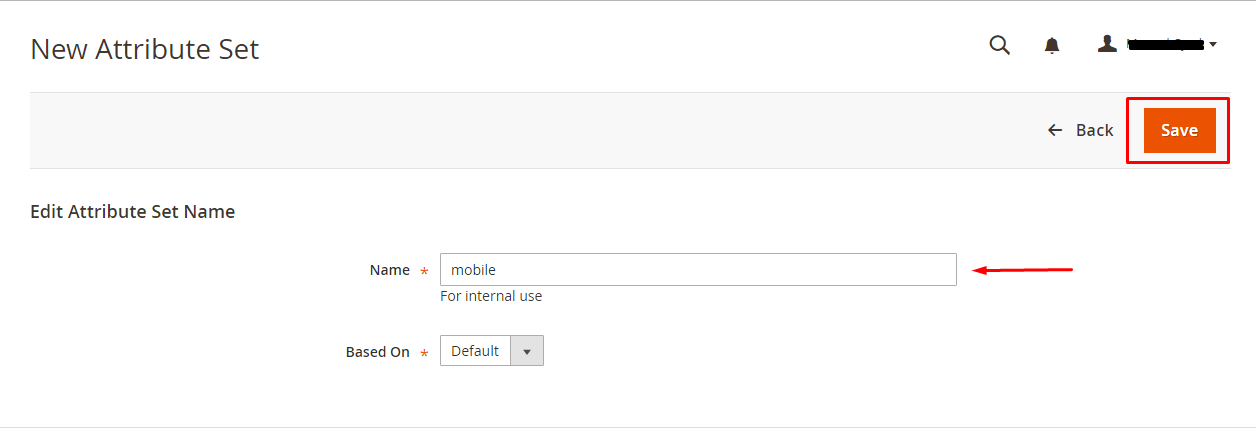
Now click on Add Attribute Set if you have not created an Attribute Set yet. Enter mobile in Attribute Set Name.
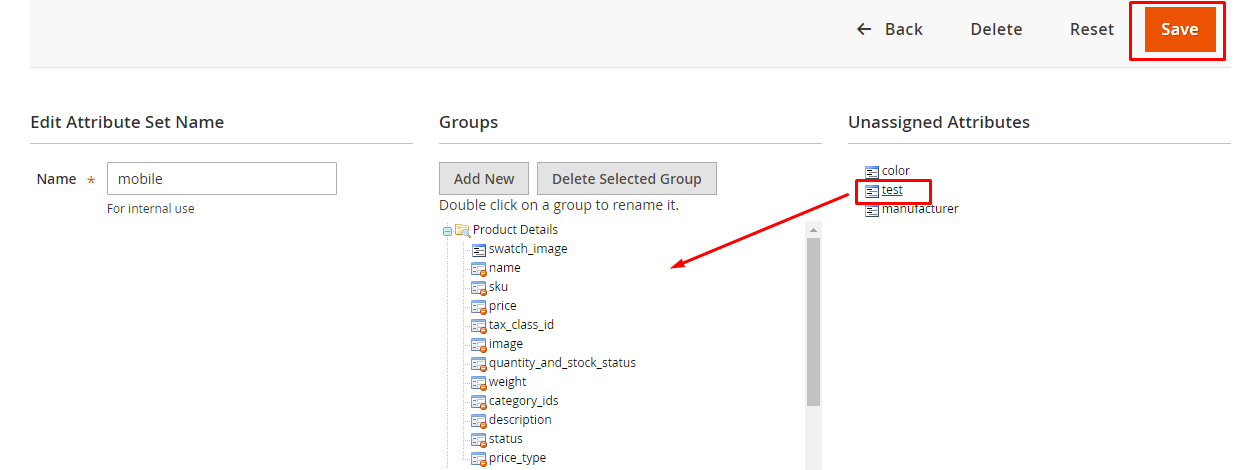
Click on mobile – Attribute Set which we have created. Drag and Drop test attribute from unassigned to Product Details and click on Save.
Configure Product Page
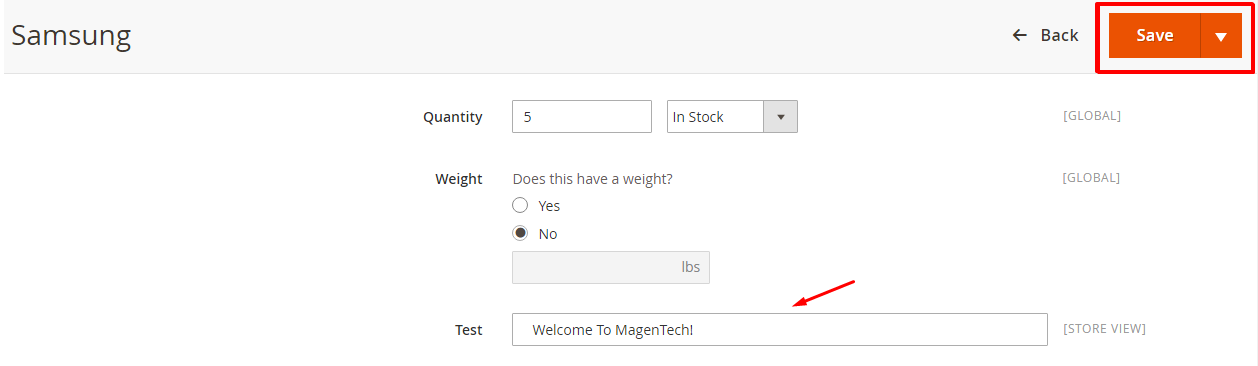
Go to your product edit page in the Admin Panel of your store. First set the template name as mobile, then Add Attribute test and click on Save:
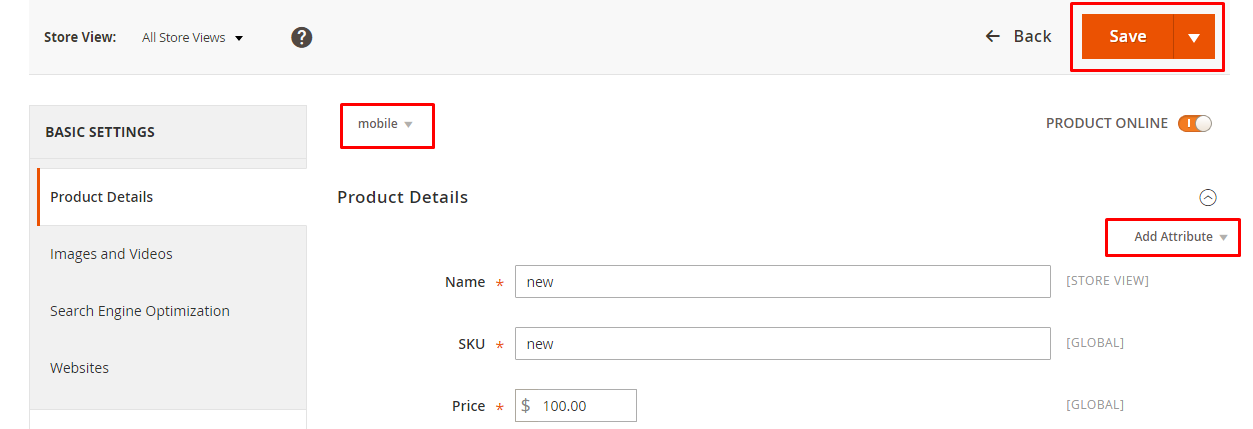
Now you can see the new attribute set test on product edit page. Update the attribute set and click on Save.
Create Layout File
In app/code/SM/MagentechThemeName/view/frontend/layout, create catalog_product_view.xml and add the following code in the file:
<?xml version="1.0"?>
<page xmlns:xsi="http://www.w3.org/2001/XMLSchema-instance"
xsi:noNamespaceSchemaLocation="urn:magento:framework:View/Layout/etc/page_configuration.xsd">
<body>
<referenceBlock name="product.info.details">
<block class="Magento\Catalog\Block\Product\View" name="test.tab"

template="SM/Magentechthemename::custom_tab.phtml" group="detailed_info" >
<arguments>
<argument translate="true" name="title" xsi:type="string">Custom Tab</argument>
</arguments>
</block>
</referenceBlock>
</body>
</page>
Create Template File
In app/code/SM/MagentechThemeName/view/frontend/templates, create custom_tab.phtml and add the following code in the file:
<?php
$product = $block->getProduct();
?>
<h1 style="color: #1979c3"><?php echo $product->getData('test'); ?></h1>
Let’s move on to running commands now.
Note: All of the following commands will have to be run in the root directory of your Magento 2.
Run this command now:
php bin/magento module:status
If you found the module in the disabled list, then you have to enable it by running the following command:
php bin/magento module:enable SM/MagenTech-Theme-Name_Mymodule
Lastly, just run all these commands:
php bin/magento setup:upgrade
php bin/magento cache:clean
php bin/magento cache:clean
Launch the Product page of your store and you will see the result:

Final Words
Following this tutorial without wandering your mind anywhere else will enable you to add a custom tab in Magento 2. If you have a problem or would like to add to the discussion, just leave a comment below.


