

Creating Product Attribute in Magento 2 includes the following steps:
- Step 1: Complete Basic and Advanced Properties Information
- Step 2: Manage Labels Enter the Field Label
- Step 3: Describe the Storefront Properties
- Sep 4: Apply New Attribute To The Product
Step 1: Complete Basic and Advanced Properties Information
On the Admin panel, click Stores. In the Attributes section, select Product. There are the currently available attributes on a store. You can edit them to fit your needs.
To create a new custom one, let's click Add New Attribute button. We will add the Clothing Materials attribute.
In the Attribute Properties Section
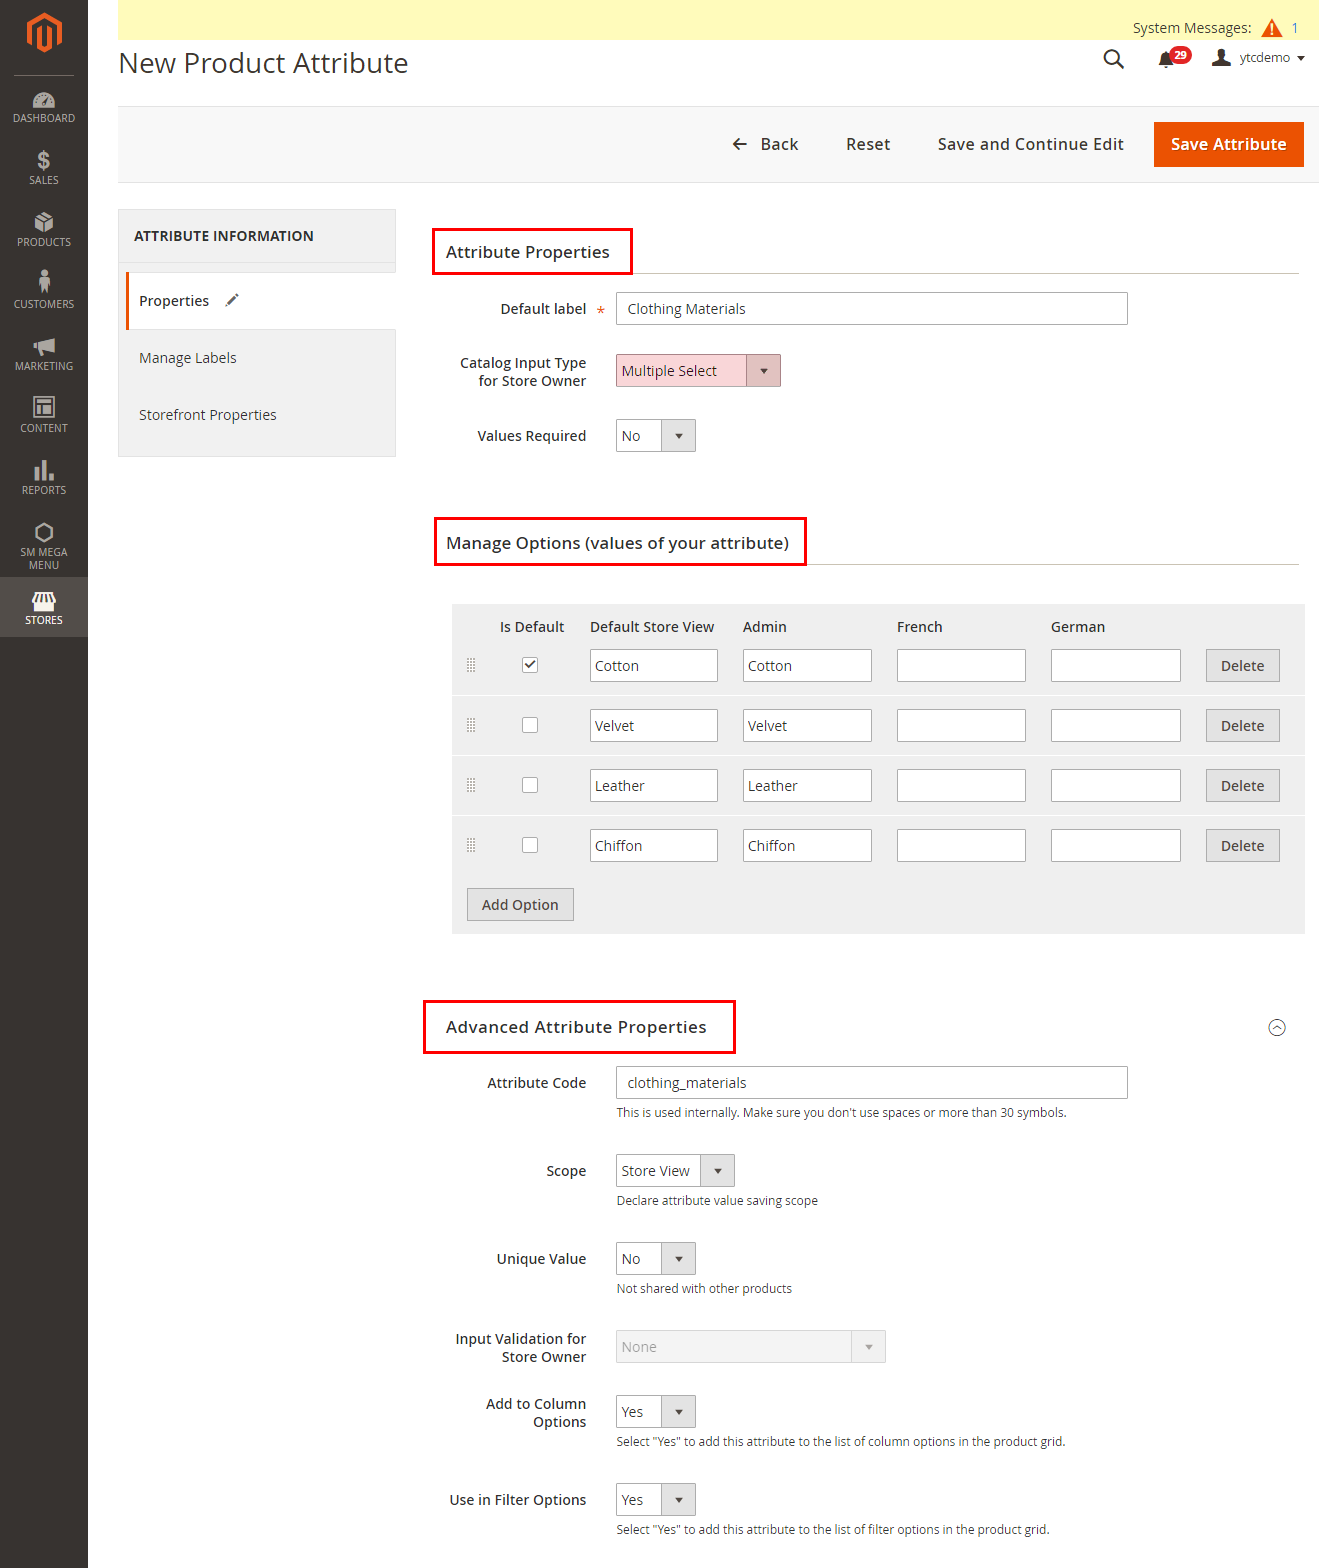
- Default Label: Enter a name to identify the attribute
-
Catalog Input Type for Store Owner: Describes what kind of data the attribute will show. For instance, if you want to manually enter the value for each product into a text field, select Text Field etc. In our case, we want to use Multiple Select.
- Text Field
- Text Area
- Date
- Yes/No
- Multiple Select
- Dropdown
- Price
- Media Image
- Fix Product Tax
- Visual Swatch
- Text Swatch
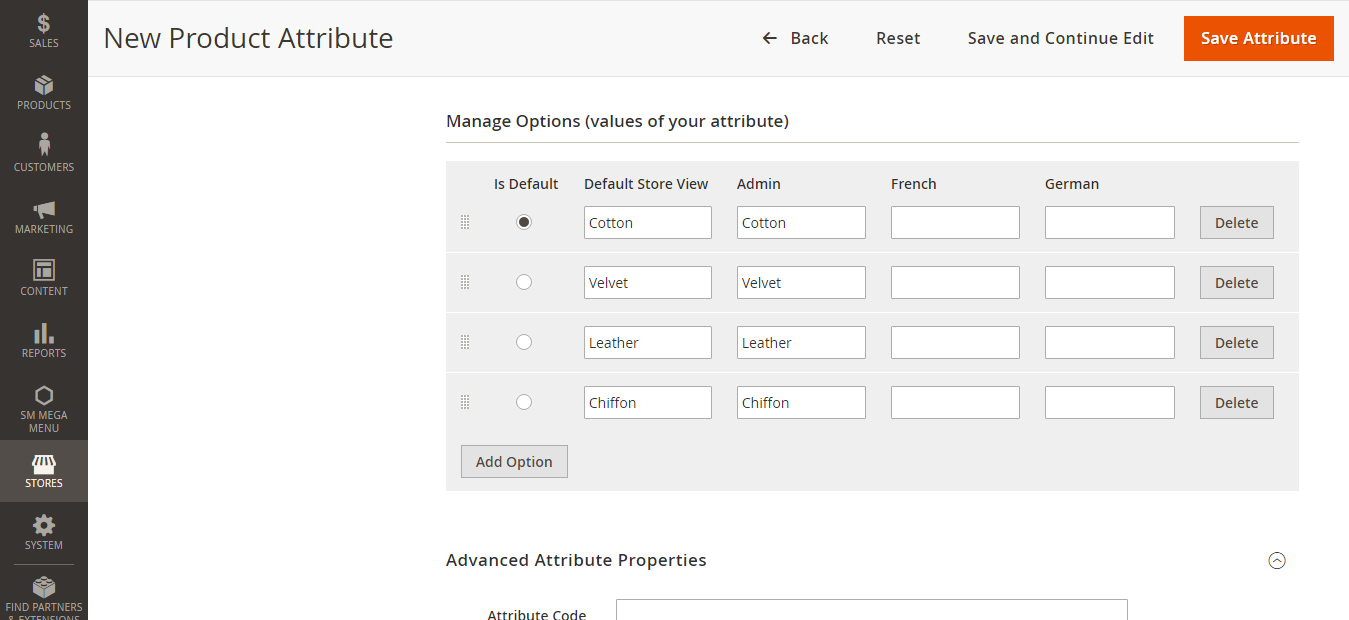
Note: If you use Dropdown and Multiple Select input types. Under Manage Options section, click Add Option button to add the needed options. Select Default if you use the option as the default value. If you have only one store view, let enter only the Admin value and it will be used for the storefront as well. Let's enter one value for the Admin and a translation of the value for each store view if you have multi-store views.
- Values Required: Select "Yes" if you want to require the customers to choose an option before they can purchase products
In the Advanced Attribute Properties Section
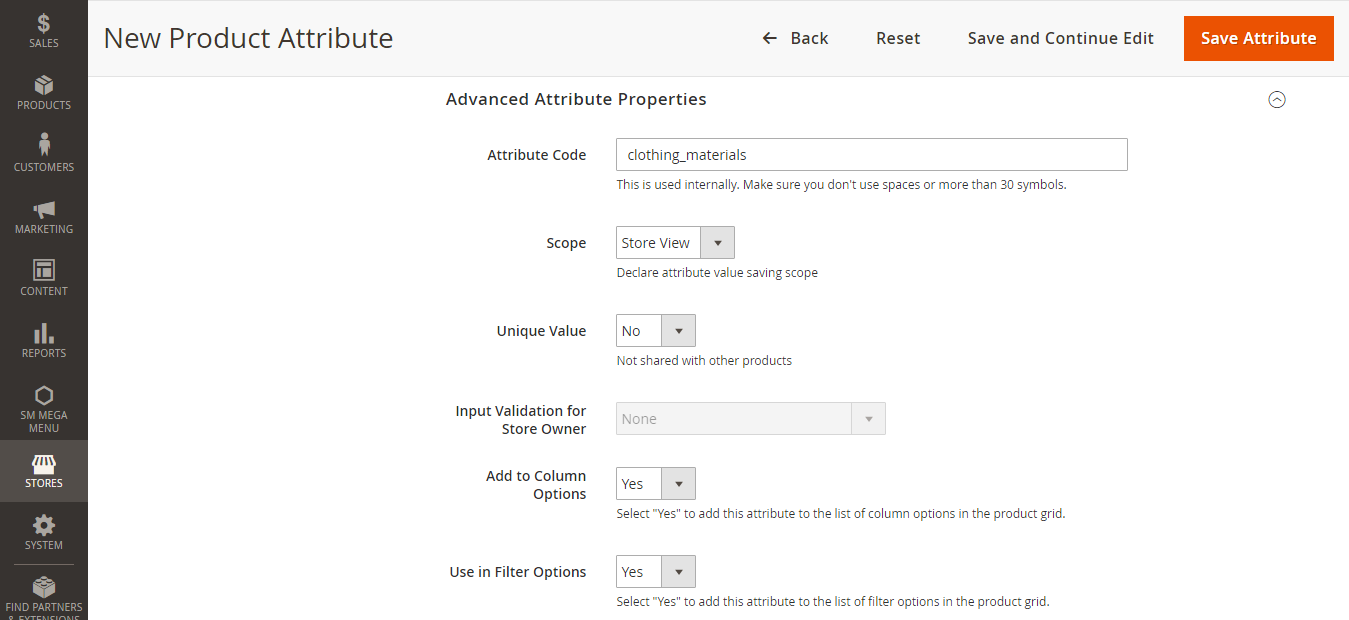
- Attribute Code: Enter a unique Attribute Code in lowercase characters, and without spaces.
- Scope: Select one of the following to indicate where in your store hierarchy the attribute can be used
- Unique Value: Select "Yes" if you want the data saved in this attribute to be unique for each product. But we rather use "No", because different product types may be made of the same material.
- Add to Column Options: Select "Yes" to add this attribute to the list of column options in the product grid.
- Use in Filter Options: Select "Yes" to add this attribute to the list of filter options in the product grid.
Step 2: Manage Labels
Open the Manage Labels section, do the following
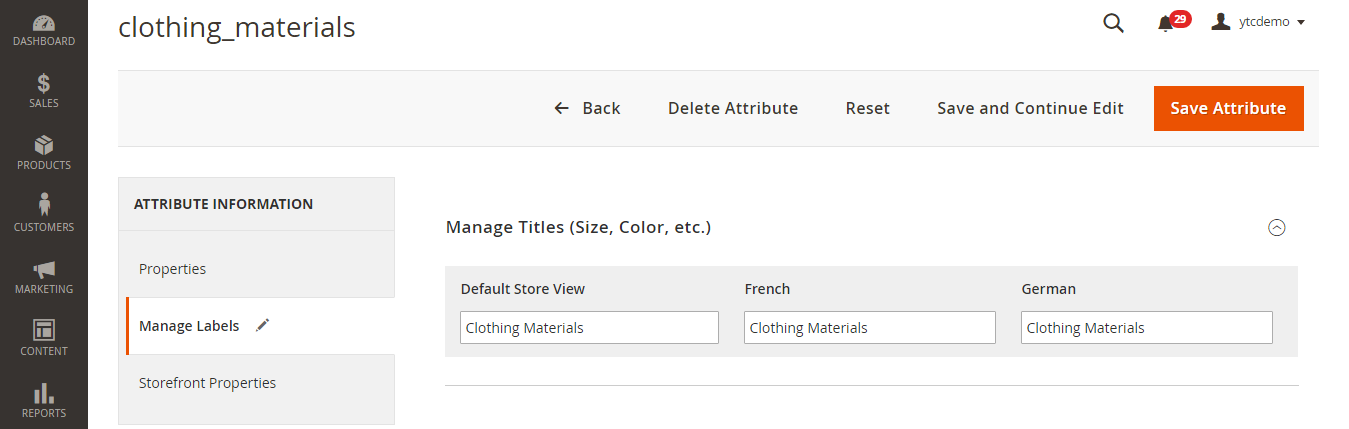
Enter a title to be used as a label for the field. If your store is available in different languages, you can enter a translated title for each view.
Step 3: Describe the Storefront Properties
Open the Storefront Properties section, do the following
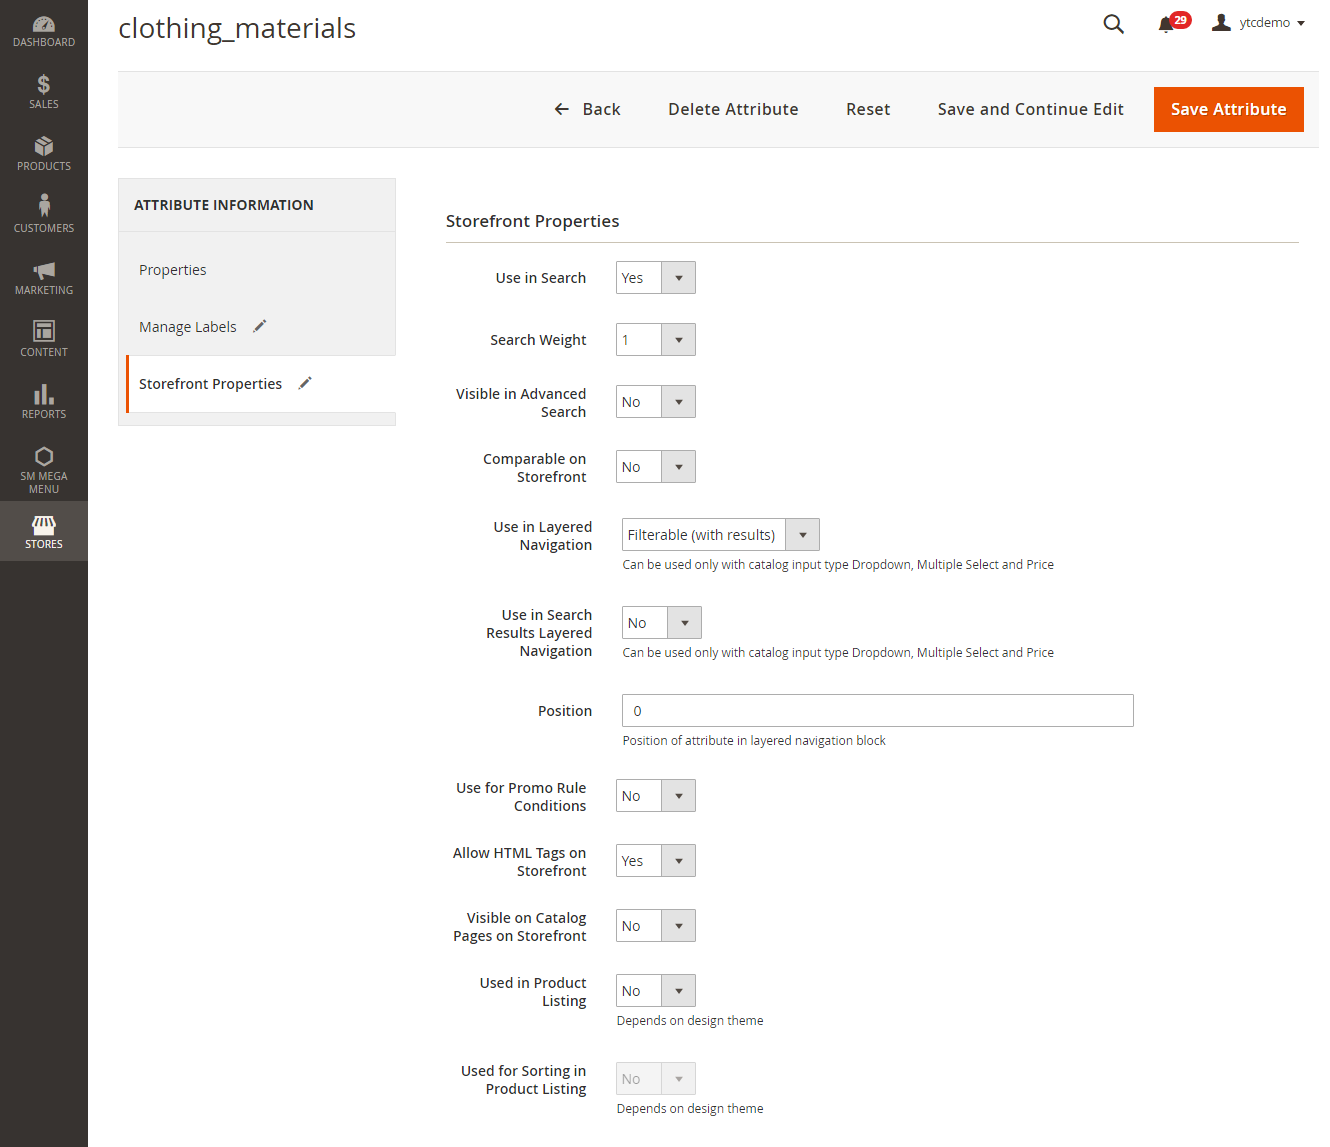
- Use in Search: Set to Yes if the attribute is to be available for search
- Comparable on Storefront: Set to Yes to include the attribute in Product Compare
- Use in Layered navigation: Set to Yes if you want to use the attribute as a filter in layered navigation
- Use in Search Results Layered Navigation: Set to Yes if you want to use the attribute in layered navigation on search results pages
- Position: Enter a number to indicate the relative position of the attribute in the layered navigation block
- Use for Promo Rule Conditions: Set to Yes to use the attribute in price rules
- Allow HTML Tags on Frontend: Set to Yes to allow the text to be formatted with HTML
- Visible on Catalog Pages on Storefront: Set to Yes to include the attribute in catalog page listings
- Used in Product Listing: Set to Yes to include the attribute in product listings
-
Used for Sorting in Product Listing: Set to Yes to use attribute as a sort parameter for product listings
When complete, click Save Attribute button.
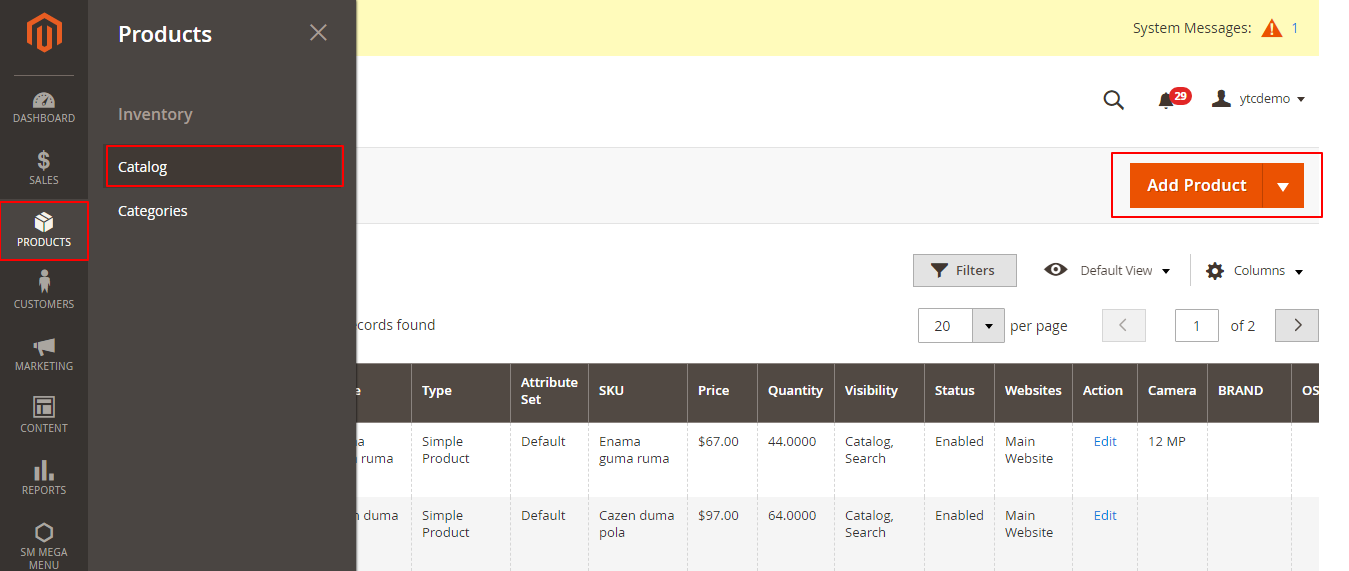
Step 4: Apply New Attribute To The Product
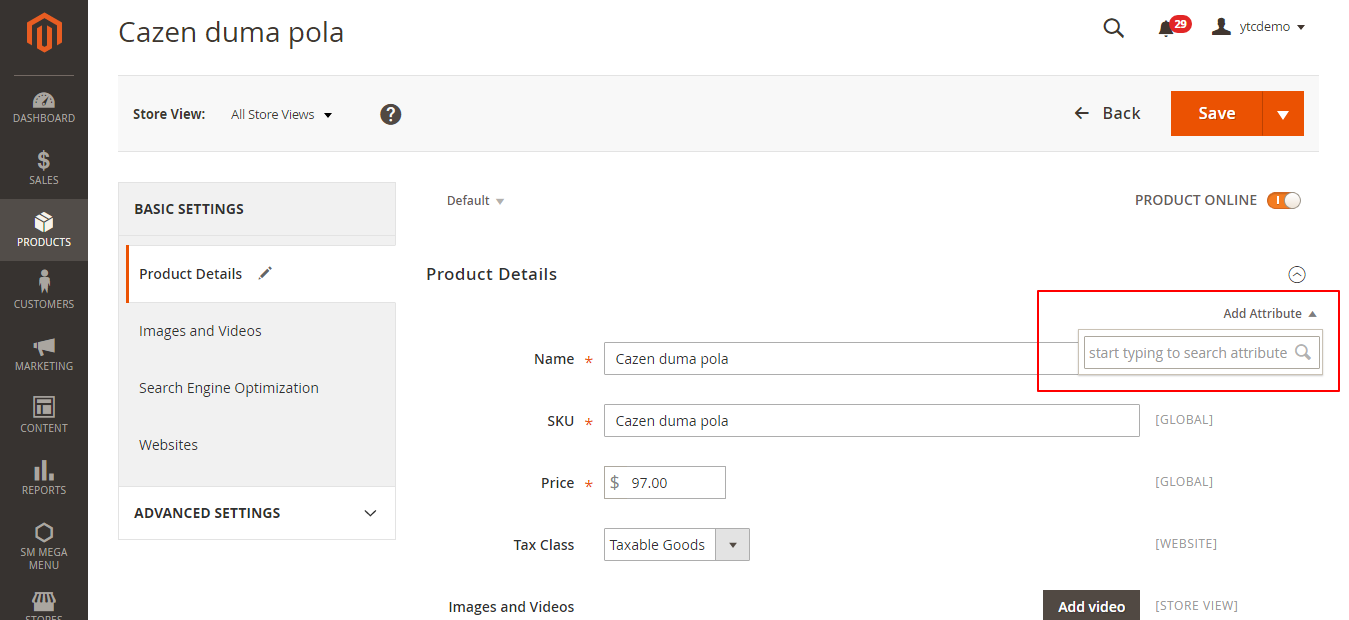
Navigate to the Products >> Catalog. Click "add product" or edit existing one. We will add a new product.
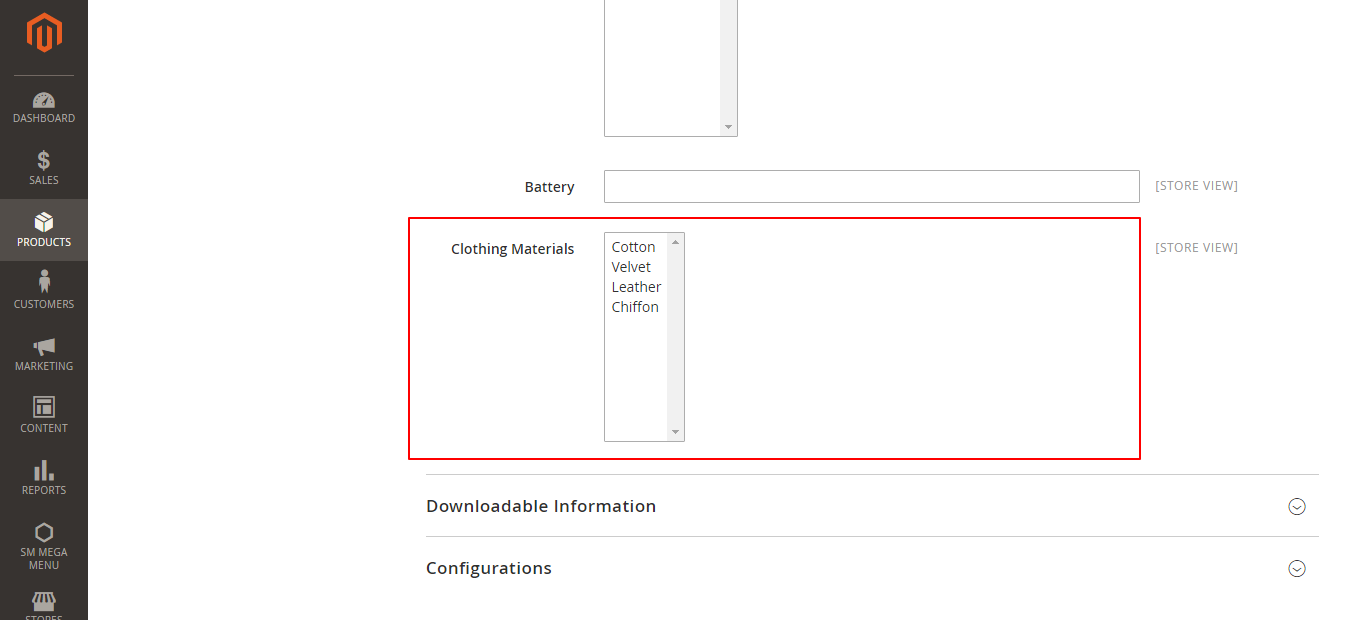
You will see the "Add attribute" tab in the top right corner, click on it. "Clothing Materials" is already there, so we can add it to our product.
Now, you have Clothing Materials and can manage it via Multiple Select.
It comes to the end of the tutorial: How to Create Product Attribute in Magento 2.
Take some time to have a look at our selection of Magento themes and Magento extensions!
Thanks for reading!


